
Tuesday, 24 November, 2020
Blogger - Themes & Embedded Images
Where and how to host embedded theme images.
The Blogger Image Paradox.
I produce and maintain quite a few Blogger themes for charity and voluntary organisations, community groups with tight-budgets, sole-traders and self-published authors.
One of the issues I have when developing new themes is where and how to host images. It’s a funny one, because for any other hosting environment you just pop them on the server, but Blogger is different, it’s a low-cost offering with no server (file) space, and it defeats the point of using Blogger if you’re going to pay for file storage.
No, I’m Not Talking About Those Images.
To be clear, I’m not talking about the images stored in the blog posts. Google uploads those and stores them on its servers. They’re fine. I’m talking about the images used as part of a Blogger theme.
Ah, The Good Old Days.
In days gone by I would upload images to Picasa Web Albums, the default location for blog post images, and use a shared URL from there to serve the images. This worked well for a few years but when Picasa was scheduled for retirement (see https://support.google.com/picasa/answer/6383491 ) the game was up and I had to find a new method.
For a while I played around with common but similar alternatives, such as hosting the images on Google Drive, Google Sites, Dropbox, OneDrive or somewhere else in the Cloud. The choices are almost never ending. And like before, it worked, but truth be told I was never totally happy with the solution. It meant I had to remember where the images were stored, check the usage conditions and make sure I wasn’t breaking them, keep track of access credentials and explain them to the client, manage organisation transitions like Picasa’s move to Google Album Archive (or is it Google Photos or Google+ ?!) – and don’t get me started on trying to find and remove all the theme’s images from the Internet.
So, I thought I’d share how I do it now.
Calling Base64. We Need You Base64.
The solution I use these days is simple. I encode the images in a Base64 image “string” and embed them right inside the theme itself. A Base64 string is essentially a long string of gobbledygook which Browsers understand and can convert in to an image.
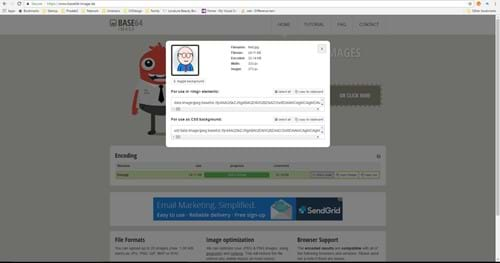
You can do this manually using a website like Base64 Image (https://www.base64-image.de/ ) a fantastic service which will encode an image for you. You can then use it as an image tag:
<img role="banner" class="img-responsive" src=" data:image/jpeg;base64,/9j/4AAQSkZJRgABAQEAW…..AAQSkZJRgABAQE”>
Or in a css Background
div.myBackground{
url('data:image/jpeg;base64,/9j/4AAQSkZJRgABAQEA… AAQSkZJRgABAQE’);
}
But You Don’t Want To Do It Like That!
I use an automated process to do this utilising the Grunt task runner (https://gruntjs.com/), with the grunt-base64 and grunt-string-replace plugins. That way I can change the images and produce a new deployable theme quickly from the command prompt.
I won’t go in to the details of how to set-up and use Grunt, that’s a whole other post, but for those who already know Grunt or are willing to learn, I’ll summarise my set-up.
Inside the Gruntfile.js I have 2 tasks, called when I call Grunt BuildAll, these are base64 and string-replace and are the top-level plugin tasks.
Base64 is set-up to convert my images, such as my banner image, in to a temporary output file like so:
base64: {
your_target: {
files: {
'images/Base64Gen/output_temp.b64': 'images/banner.png'
}
},
}
String-replace is set-up to open a Blogger theme template file and find the string {{ JAGC_BASE64IMAGE_HERE }} and replace it with the content of output_temp.b64.
'string-replace': {
insertBase64intoTheme: {
files: {
cwd: ".",
/*dest*/ 'deployable-website.html': /*src*/ 'deployable-template.html',
},
options: {
replacements: [{
pattern: /{{ JAGC_BASE64IMAGE_HERE }}/g,
replacement: function (match, p1) {
return grunt.file.read("images/Base64Gen/output_temp.b64");
}
}]
}
}
}
Lastly, the Blogger theme template has a line in it somewhere which says:
<img src="data:image/png;base64, {{ JAGC_BASE64IMAGE_HERE }}" alt="My blog theme image" />
Warning! Warning!
I should caveat this post with a note on performance. Base64 images will probably help your blog download quicker, as there will be no additional network requests for the image, and initially display your page quicker too; but, browsers don’t cache Base64 images the way they cache standard image files, so subsequent downloads are likely to take longer than for themes with standard linked images. If cutting edge performance is your goal then Base64 images may not be for you.
Phew! That’s A Wrap.
If you’re new to Base64 and Grunt this may seem like a lot of work when you could just upload the images somewhere and link to them in your theme, but trust me, when you produce a lot of Blogger themes or even just when you’re in active development on one of them, having this image set-up really speeds up the development process, you never have to worry about where the images are being hosted again, and you don’t have to continually upload and change the links when the images change either.
Want to Thank Me?
Did you like this article? Was it helpful? Why not buy me a coffee on Paypal? Buy me a coffee?